Eleventy: Building an Image Gallery with CSS Grid and PhotoSwipe

TL;DR: I’ve set up a CodePen project that you can dig through.
For as long as I’ve been blogging I’ve wanted to have a photo gallery solution, so that I could mix in batches of photos without necessarily creating a super-long scroll on a post. Earlier versions of my blog linked to galleries that I managed in Flickr, and that remains an option. However, one of my design principles for this site was to keep as much of the content within the site as possible.1
So I started looking for a solution, and let me tell you: there are a lot of JavaScript image gallery/lightbox solutions out there. My list of requirements was fairly short:
- Touch and keyboard support
- Minimal UI
- Vanilla JavaScript2
I ended up testing three solutions:
- Medium Zoom: this has a pretty nice execution but lacked keyboard support
- SmartPhoto: I like this one but the display falls apart on very small viewports, like my first-generation iPhone SE
- PhotoSwipe: This is what I ended up using
I heard about PhotoSwipe through this Twitter thread from Tatiana Mac, specifically this reply from Rich Holman. Rich’s example was more of a standalone gallery, not one tied to a post, but it had the seeds of what I needed.
PhotoSwipe managed to check off my requirements, and more importantly the experience felt nice when I was testing on different devices. That said, it’s not an automated solution where you just point it at a folder of images. The documentation is very clear about it requiring some work to set up. There are pretty good examples in the documentation, though, and I had a functional implementation after working on it in small stretches over two days. What follows is very specific to my implementation within Eleventy, but I hope it’s helpful for others with a similar scenario in mind.
I’ve broken this up into three big areas of concern:
- Markup for the gallery items
- The PhotoSwipe setup code to process the gallery items
- Eleventy-specific template notes
I have a few dependencies that may not match your setup: I use Nicolas Hoizey’s Images Responsiver plugin,3 and I use Netlify Large Media to scale images on the server side, instead of pre-processing images as a build step.
Generating the gallery markup #
Here’s an example of the markup pattern I wanted to generate:
<div class="gallery">
<ul>
<li>
<figure class="gallery-2x3">
<a href="wildwood-lake-1.jpg" data-size="gallery-2x3"><img src="wildwood-lake-1.jpg?nf_resize=fit&w=400" alt="Tree emerging from cracked ice" title="Frozen lightning" class="" srcset="wildwood-lake-1.jpg?nf_resize=fit&w=240 240w, wildwood-lake-1.jpg?nf_resize=fit&w=320 320w, wildwood-lake-1.jpg?nf_resize=fit&w=400 400w" sizes="(min-width: 45em) 400px, 100vw" data-pristine="wildwood-lake-1.jpg" loading="lazy"></a>
<figcaption class="visually-hidden">
Frozen lightning
</figcaption>
</figure>
</li>
<!-- More list items follow here -->
</ul>
</div>There’s a couple of things to note here:
- I’m using an unordered list
- I decided to use
<figure>markup for consistency, even when I didn’t have a caption - I wanted to visually hide the
figcaptionelement so that the grid wouldn’t show the captions, but they would be available to screen readers.
Images Responsiver configuration #
All of this markup is generated by the Images Responsiver plugin. PhotoSwipe requires image dimensions to be specified, but since I’m using Netlify Large Media I don’t really have a set of build-time derivatives/sizes.4 Instead I decided to focus on the most common aspect ratios for my images: 3:2 and 4:3 (and their vertical counterparts), 16:9, and 1:1. Defining those in the Images Responsiver config would allow me to add a CSS class that mapped to a set of image dimensions for PhotoSwipe.
Here’s an example of one entry from my images-responsiver-config.js file:
gallery_3x2: {
	sizes: "(min-width: 45em) 400px, 100vw",
	classes: ["gallery-3x2"],
	fallbackWidth: 400,
	minWidth: 240,
	maxWidth: 400,
	steps: 3,
	runAfter: runAfterHookGallery,
},
This means that any image using the gallery_3x2 attribute in Markdown will get the gallery-3x2 CSS class applied to its <figure> markup (as well as an attribute on the <a> tag).
So this Markdown:
{data-responsiver=gallery_3x2}results in this markup:
<figure class="gallery-3x2">
<a href="wildwood-lake-3.jpg" data-size="gallery-3x2">
<img
src="wildwood-lake-3.jpg?nf_resize=fit&w=400"
alt="Broken stump"
title="This one looks like a ruined tower"
class=""
srcset="wildwood-lake-3.jpg?nf_resize=fit&w=240 240w, wildwood-lake-3.jpg?nf_resize=fit&w=320 320w, wildwood-lake-3.jpg?nf_resize=fit&w=400 400w"
sizes="(min-width: 45em) 400px, 100vw"
data-pristine="wildwood-lake-3.jpg"
loading="lazy">
</a>
<figcaption class="visually-hidden">This one looks like a ruined tower</figcaption>
</figure>Looking a bit closer at the config, the highlighted lines below define the default width for the image src attribute, and the srcset widths (240–400 range with three steps results in 240w, 320w, 400w).
gallery_3x2: {
	sizes: "(min-width: 45em) 400px, 100vw",
	classes: ["gallery-3x2"],
	fallbackWidth: 400,
	minWidth: 240,
	maxWidth: 400,
	steps: 3,
	runAfter: runAfterHookGallery,
},
The last line tells Images Responsiver to use the runAfterHookGallery callback, where the actual <figure> markup is generated:
const runAfterHookGallery = (image, document) => {
	let imageUrl =
		image.getAttribute("data-pristine") || image.getAttribute("src");
		let caption = image.getAttribute("title");
		if (caption !== null) {
			caption = md.renderInline(caption.trim());
		}

	const figure = document.createElement("figure");
		figure.classList.add(...image.classList);
		// TODO: decide whether classes should be removed from the image or not
		image.classList.remove(...image.classList);

		const link = document.createElement("a");
		link.setAttribute("href", imageUrl);
		link.setAttribute("data-size", figure.classList[0]);
		link.appendChild(image.cloneNode(true));

		figure.appendChild(link);
		if (caption) {
		let figCaption = document.createElement("figcaption");
		figCaption.innerHTML =
			(caption ? caption : "");
		figure.appendChild(figCaption);

		}

		// Parent node of the image is a <p> because image is an inline element,
		// and Markdown will wrap in a < p > tag
		if (image.parentNode.nodeName === "p") {
			image.parentNode.replaceWith(figure);
		} else {
			image.replaceWith(figure);
		}
};
That’s a pretty dense chunk of code, but here’s what it does: it finds the image created from the initial Markdown rendering pass, wraps it in figure and link markup, injects the appropriate classes/attributes from the Images Responsiver config declaration, and then replaces the original image with the new markup.
PhotoSwipe configuration #
With the markup done, I shifted focus to the PhotoSwipe configuration JavaScript that would scan the list of images and create an array of objects for the core PhotoSwipe code to display.
All of my code to set up PhotoSwipe is in a photoswipe-dom.js file, included on image gallery posts. It’s a long file, so I’ll just highlight a few specific things below.
Image dimensions #
How to give PhotoSwipe dimensions when Netlify Large Media lets me define sizes on the fly? I realized that I could just decide on sizes for each of the preset aspect ratios specified in my Images Responsiver config. I defined an object with entries for each of the aspect ratios I declared in my Images Responsiver config. Each of these entries has width and height dimensions for three broad sizes (small, medium, and large):
const imageSizes = {
  "gallery-3x2": {
      small: {
          width: 600,
          height: 400
      },
      medium: {
          width: 900,
          height: 600
      },
      large: {
          width: 1200,
          height: 800
      }
  },

  // more presets here

}
The key for the object matches the data-size attribute in the wrapper link around the image markup. So for an image with a data-size link attribute gallery-3x2 I now have small/medium/large dimensions that I can feed into the PhotoSwipe code.
Parsing DOM Elements for PhotoSwipe #
The PhotoSwipe example code for serving up different images included an example method parseThumbnailElements(). I had to modify the selector code since I decided to wrap my elements in an unordered list. The example also used a two image system, whereas I wanted to have more sizes. So in my code when I initialize each item I pack in the dimensions for each size:
// create slide object
item = {
    src: linkEl.getAttribute('href'),
    orig_src: linkEl.getAttribute('href'),
    small: size.small, // sub-object with width/height values
    medium: size.medium,
    large: size.large
};
Resize handler #
In the beforeResize listener I check the viewport width, and select the appropriate small/medium/large String to use in the gettingData handler:
// beforeResize event fires each time size of gallery viewport updates
gallery.listen('beforeResize', function() {
    // calculate real pixels when size changes
    // realViewportWidth = gallery.viewportSize.x * window.devicePixelRatio;
    realViewportWidth = gallery.viewportSize.x;

    // Code below is needed if you want image to switch dynamically on window.resize

    // Find out if current images need to be changed
    if (realViewportWidth <= 720) {
        if (imageSize != "small") {
            imageSize = "small"
            imageSrcWillChange = true;
        }
    } else if (realViewportWidth > 720 && realViewportWidth <= 1040) {
        if (imageSize != "medium") {
            imageSize = "medium"
            imageSrcWillChange = true;
        }
    } else {
        if (imageSize != "large") {
            imageSize = "large"
            imageSrcWillChange = true;
        }
    }

…

});
The final piece in my PhotoSwipe code is actually assigning the proper image size. In the gettingData handler I actually assign the proper Netlify Large Media parameters to the src URL, and assign the dimensions from the info that was added to the slide object. So if the code above gives us an imageSize of medium, we want to grab item.medium.width and item.medium.height:
// gettingData event fires each time PhotoSwipe retrieves image source & size
gallery.listen('gettingData', function(index, item) {
    // Set image source & size based on real viewport width
    // feed the Neltify resize parameter the same small/medium/large width that will be assigned in the dimensions
    item.src = `${item.orig_src}?nf_resize=fit&w=${item[imageSize].width}`;
    item.w = item[imageSize].width;
    item.h = item[imageSize].height;

    // It doesn't really matter what will you do here,
    // as long as item.src, item.w and item.h have valid values.
    //
    // Just avoid http requests in this listener, as it fires quite often

});
Styling the gallery itself #
Whew. Ok. We now have a system of aspect ratios in our Images Responsiver config, and the code to take that aspect ratio ID and turn it into the image URL and width/height dimensions so that PhotoSwipe can do its work when it opens the lightbox for display. At this point everything is functional, but we’re still looking at an unstyled list of images:
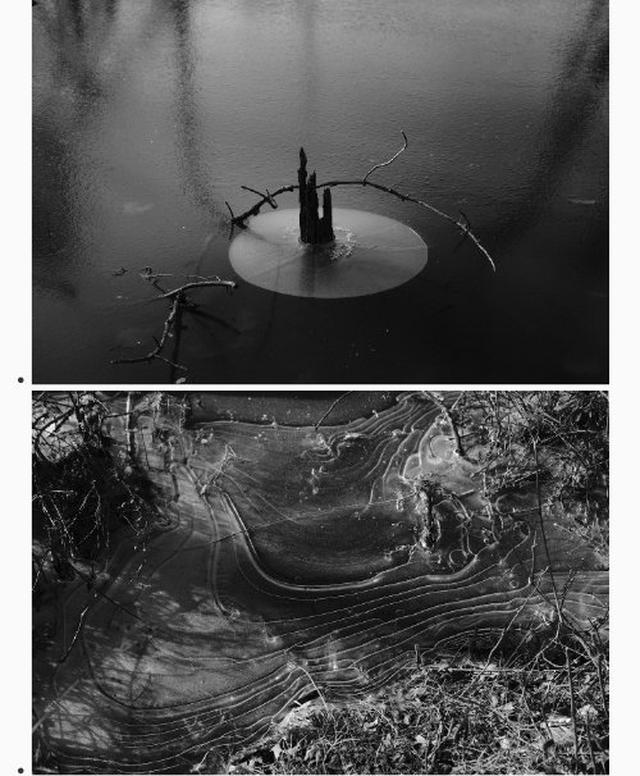
Last year I’d been doing some initial tests with a CSS Grid masonry layout, using some column/row spanning.5 Then I put the image gallery on hold for several months to finish out my site, and in the interim CSS Grid Masonry became an (almost) reality.6 This article by Rachel Andrew in Smashing Mag does a great job explaining things, but really the magic exists in one new line:
grid-template-rows: masonry;Masonry is here(ish) #
Ok so masonry support is on the horizon, but only in Firefox for now (and you have to enable it with a flag). So I still needed a basic grid for other CSS Grid-supporting browsers, and then I could use a @supports at-rule to implement my masonry code. I use a simple two-column grid, and set the images to use object-fit: cover so that the grid stays even with both horizontal and vertical images.
.gallery > ul {
  display: grid;
  grid-template-columns: repeat(2, 1fr);
  grid-auto-rows: 200px;
  grid-gap: 1em;
  padding: 0;
}

.gallery > ul > li {
  list-style: none;
}

.gallery li a {
  display: block;
  line-height: 0;
  height: 200px;
  max-height: 200px;
}

.gallery > ul > li img {
  width: 100%;
  height: 100%;
  max-height: 100%;
  object-fit: cover;
  object-position: 50% 50%;
}
That ends up looking like this:

And for the browsers who have masonry:
@supports (grid-template-rows: masonry) {
  .gallery > ul {
    grid-template-columns: repeat(2, 1fr);
    grid-template-rows: masonry;
  }

  // Unset any properties that constrain the grid elements
}
Which gives us a slightly more dynamic layout:

Eleventy template optimizations #
After my first implementation I decided that I didn’t want to have the PhotoSwipe lightbox markup and JavaScript on every page, so I broke out a sub-template of my core post.njk Nunjucks template. I created a post-gallery.njk variant, and in that template the lightbox markup, plus the three JavaScript files (photoswipe.min.js, photoswipe-ui-default.min.js, and photoswipe-dom.js), are rendered after all the post content. In my YAML front matter for the post I specify to use this template instead of the default:
layout: layouts/post-gallerySince the PhotoSwipe CSS files are linked in the <head>, in my base.njk Nunjucks file I check for that layout type and include the PhotoSwipe CSS files:
{% if layout === "layouts/post-gallery" %}
    <link rel="stylesheet" href="{{ '/css/photoswipe/photoswipe.css' | url }}" media="print" onload="this.media='all'">
    <link rel="stylesheet" href="{{ '/css/photoswipe/skin/skin.css' | url }}" media="print" onload="this.media='all'">
{% endif %}
Gallery shortcode #
It wasn’t strictly necessary (because Markdown will happily accept HTML code) but I created a {% gallery %} paired shortcode for Eleventy:
eleventyConfig.addPairedShortcode(
  "gallery", (data) => {
    const galleryContent = markdownLibrary.render(data);
    return `<div class="gallery">${galleryContent}</div>`;
  }
);
The example gallery that closes out this post has this Markdown snippet to generate the gallery:
{% gallery %}
- {data-responsiver=gallery_2x3}
- {data-responsiver=gallery_3x2}
- {data-responsiver=gallery_2x3}
- {data-responsiver=gallery_2x3}
- {data-responsiver=gallery_3x2}
{% endgallery %}
What’s left? #
The lightbox modal is keyboard-friendly but could use some screen reader improvements. Whether I can do that without hacking core PhotoSwipe code is to be determined. (If you know your way around ARIA enhancements and have some time to look at code with me, I’d appreciate it.)
I’ve been sketching out a few ideas for boilerplate versions of content: regular posts, book posts—one for galleries that reads images in a directory and stubs out the gallery Markdown code might be a time-saver.
I hope this has been helpful. If you’re curious about anything here, my Twitter DMs are open.
A small example #
What does this all look like put together? Here’s a small batch of photos taken around City Hall in downtown Philadelphia, just before Christmas Day:
Wow, photo-sharing social networks are a mess right now. Instagram is bloated with features yet doesn’t even have a good model for galleries. Flickr is still around, but I don’t quite like how they’re presented. Exposure is very nice but I wanted to keep the post anchored within my own site. ↩︎
This is purely a personal preference. If I had existing jQuery plugins that I wanted to use, I would have searched in the deeper pool of jQuery-based options. ↩︎
Netlify Large Media lets you transform images using URL parameters. ↩︎
Examples abound, but I used this tweet by Amber Weinberg Jones as a starting point. ↩︎
Here’s the Can I Use report: Firefox only for now, using an experimental flag. ↩︎
